VW TDI forum, Audi, Porsche, and Chevy Cruze Diesel forum banner

Intake Manifold Flap Position Sensor P2015

263K views 119 replies 44 participants last post by  BADRY  
#1 ·
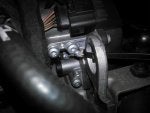
Has anyone found a solution to the intake manifold flapper motor issue? Apparently VW does not sell only the motor which is easily removed and replaced. They only sell the complete intake manifold. The motor looks exactly like the one on the 2.0 gas engine but has a different part number.

Any advice?


1 Fault Found:
008213 - Intake Manifold Flap Position Sensor (Bank 1): Implausible Signal
P2015 - 000 - -
Freeze Frame:
Fault Status: 01100000
Fault Priority: 2
Fault Frequency: 1
Mileage: 201689 km
Time Indication: 0
Date: 2000.00.00
Time: 20:29:45
 
#3 · (Edited by Moderator)
I've just search for every part that you said intake manifold flap sensor motor to see if its a seperate item but nothing shows in those descriptions.

VAG Error Code: 18447
EOBD II Error Code: P2015

Fault Location:
Intake Manifold Air Control Actuator Position Sensor/Switch, Bank 1 - Implausible Signal

Possible Cause:
Malfunction Indicator Light (MIL) ON
Power Loss

Intake Manifold Flap faulty
Intake Manifold Flap Motor (V157) stuck/faulty
Engine Control Module Software/Firmware Version faulty
Wiring and/or Connector(s) from/to Intake Manifold Flap Motor (V157) faulty

Possible Solutions:
Check Intake Manifold Flap
Check/Replace Intake Manifold Flap Motor (V157)
Perform Output Tests/Basic Setting
Check Wiring and/or Connector(s) from/to Intake Manifold Flap Motor (V157)

Special Notes:
In some Cases the Issue can only be resolved by Replacing the whole Intake Manifold.
The Intake Manifold Flap Motor (V157) and Manifold Runner Position Sensor (G336) may be Part of the same Unit.
When found in a VW Golf/Jetta (1K): 1.9l PD-TDI (BRM), check Engine Control Module (ECM) Software Version:
03G-906-016-AB @ 7328 or 7550 as well as 03G-906-016-AC @ 7280 or 7551 do have a Software Error which requires a special Adaptation for the Intake Manifold Flap Motor (V157) which at this Point can only be performed with the Factory Tool.


As taken from my Free EOBD II Error Codes software
 
  • Helpful
Reactions: AG-Admin
#4 ·
how to bleed high pressure lines after replacing intake manifold

on another site, poster replaced intake manifold to remedy P2015.

it would not start, and after transport to a TDI mechanic, was told the missing procedure was bleed of air from the high pressure lines to the injector.

any experience in bleed procedure for the CBEA HP lines to the injectors?

I was surprised, since there is a return line on each injector.
 
#5 · (Edited by Moderator)
Warranty extended

Welcome to the forum. welcometomyturbodies

I've just search for every part that you said intake manifold flap sensor motor to see if its a seperate item but nothing shows in those descriptions.

VAG Error Code: 18447
EOBD II Error Code: P2015

Fault Location:
Intake Manifold Air Control Actuator Position Sensor/Switch, Bank 1 - Implausible Signal

Possible Cause:
Malfunction Indicator Light (MIL) ON
Power Loss

Intake Manifold Flap faulty
Intake Manifold Flap Motor (V157) stuck/faulty
Engine Control Module Software/Firmware Version faulty
Wiring and/or Connector(s) from/to Intake Manifold Flap Motor (V157) faulty

Possible Solutions:
Check Intake Manifold Flap
Check/Replace Intake Manifold Flap Motor (V157)
Perform Output Tests/Basic Setting
Check Wiring and/or Connector(s) from/to Intake Manifold Flap Motor (V157)

Special Notes:
In some Cases the Issue can only be resolved by Replacing the whole Intake Manifold.
The Intake Manifold Flap Motor (V157) and Manifold Runner Position Sensor (G336) may be Part of the same Unit.
When found in a VW Golf/Jetta (1K): 1.9l PD-TDI (BRM), check Engine Control Module (ECM) Software Version:
03G-906-016-AB @ 7328 or 7550 as well as 03G-906-016-AC @ 7280 or 7551 do have a Software Error which requires a special Adaptation for the Intake Manifold Flap Motor (V157) which at this Point can only be performed with the Factory Tool.

As taken from my Free EOBD II Error Codes software
VW has extended the warranty to 10yrs or 193k km in canada for these issues for the flap motor.
 
#6 ·
P2015 FIX!
yes i found the issue on the CBEA TDI tonight. trying a fix now will let you know how it goes. i will try to show pictures after fix. replacing motor will not fix this issue i have. what is happened to mine is the arm from the intake slides aa little bit when the motor sets on/back of car, then will not be able to move forward when off/ toward front of vehicle. i made a video and posted it on you tube. under rmartjr "P2015 fix 2009 VW TDi" here is the link i think, at around 2:50 it shows the parts fixed if you cant stand my explaining what i found! after one day no light has come on yet.


hope this helps
 
#8 ·
Thanks rmartjr

After watching your video I looked at mine - exactly the same as what you described. Pulled the motor off and tried your trick of installing a snap ring. Cutting the groove was tricky in the plastic, hopefully it will last. If the snap ring does not work I might try drilling a small hole and installing safety wire to keep linkage from sliding off again.
 
#9 ·
hopefully it stays

thanks for replying. this was my first video after i saw "exovcds" on youtube, people liked the help. i thought since i always get help with my older VWs this might help someone else so im glad i did it. i used a sawzall metal cutting blade, by hand, to put a groove in mine most the way around. now with 100 miles on it, no problems. i thought about putting a screw in the end, after grinding some of the end off, but a safety wire is a better idea. hope this helps alot untill someone designs a better fix.
 
#10 · (Edited by Moderator)
After watching your video I looked at mine - exactly the same as what you described. Pulled the motor off and tried your trick of installing a snap ring. Cutting the groove was tricky in the plastic, hopefully it will last. If the snap ring does not work I might try drilling a small hole and installing safety wire to keep linkage from sliding off again.
So, you found it was easier to pull the motor? I just looked at mine tonight, and it certainly looks like a tight fit on the left side, and I can see why. I haven't started to dig into pulling it off. Anything I should know? Thanks
 
#11 ·
it's really easy

it's pretty straight foward 3Xt30 screws, needle nose pliers for the spring, or something comparable, the arm just pulls off. i took it off to put the groove around the actuating arm on the motor. i tried not to but it was to tight. good luck
 
#14 ·
it's really easy

it's pretty straight foward 3Xt30 screws, needle nose pliers for the spring, or something comparable, the arm just pulls off. i took it off to put the groove around the actuating arm on the motor. i tried not to but it was to tight. good luck
Thanks man. So last night my brother and I were trying to figure this out. Since I do not have VCDS, I couldn't get the switch to move (obviously) but it looked fine...After losing the spring and looking for it for an hour, we were unable to remove the motor though. Does it just pull straight out?
We removed the 3 screws and unplugged the switch, but it felt like the motor was still attached from underneath and we didn't want to yank on it. Does it just pull right out?

Just suffered the P2015 fault.

Went online and found a new one for about $140.00 (just the sensor/motor) shipping included.

To replace:
  1. Remove 3 - T30 screws (1/4 drive socket)
  2. Disconnect electrical connector
  3. Remove link on sensor/motor side
  4. Remove spring
  5. Lose and find spring (AVOID THIS STEP).
  6. Attach link
  7. Install spring
  8. Re-install 3 - T30 screws
  9. Connect electrical connector
  10. Reset code.
  11. Start engine and check for trouble codes.
Total time for replacement including clean up 2-1/2 hours (of which 1-1/4hrs was wasted finding the stupid spring).

Have yet to check if the motor failed. Will post results if I find any.
Do you have a link or part# information by any chance?
I have a feeling i have to remove the whole thing and replace it.
PS. We also lost the spring and it took us like an hour outside at night on 20 degree weather to find it.
 
#12 ·
Thanks. I'm going to pick up a pack of e-clips and a pack of snap rings this weekend. I know they're less than $10 bucks for a ton of them from harbor freight. I'll have both on hand when I pull it off. I need to first test it to make sure that's really what's throwing the code, but I'm sure it will be just like yours. I'm glad I found this thread.
 
#13 ·
Just suffered the P2015 fault.

Went online and found a new one for about $140.00 (just the sensor/motor) shipping included.

To replace:
  1. Remove 3 - T30 screws (1/4 drive socket)
  2. Disconnect electrical connector
  3. Remove link on sensor/motor side
  4. Remove spring
  5. Lose and find spring (AVOID THIS STEP).
  6. Attach link
  7. Install spring
  8. Re-install 3 - T30 screws
  9. Connect electrical connector
  10. Reset code.
  11. Start engine and check for trouble codes.
Total time for replacement including clean up 2-1/2 hours (of which 1-1/4hrs was wasted finding the stupid spring).

Have yet to check if the motor failed. Will post results if I find any.
 
#15 ·
The part number is 03L 129 086 V120 or VDO A2C53248883 but confirm it anyway by snapping off the cosmetic cover and using your smartphone to snap a pic and reading the numbers off the picture (that's how I did it)

If you can't find the part, they are rare but available (I tried and contact VDO directly and it only made for VW and no luck) buy the manifold and take the part off, and replace the part yourself. Still cheaper than full replacement cost by about $700.00

Only other thing make sure the flap is free.
 
#16 ·
hello rmartjr
i had the same prob last year - so i bought a new peace , last mouth i got this problem again. And i didn’t believe that the second one is bad too as the first one looked just fine!!. so i was looking for answers on the web and i found yours! TX for your help- it solved my prob ok. the only different that i solved it differently.. i just tried to poll out the small bridge connector (with the two wholes on it to try to put some grease over there- but there was no room for that - so i left it half way out when one side we have the motor arm and the other side we have the engine block – the moment i did that all the probes disappear!! and it works just fine now ) i will leave it like that for some time and hope its ok. On the same time i will try to do what you did on my first VDO that is fine too.
Thanks again for your video!!
 
#17 ·
how to reset the malfunction without the ROSS software ( the one that related to the VDO - "yellow engine')
Normal operation of the VDO;
When you turn on the engine the "VDO leg should position itself immediately to half way of the maximum of the 180 degrees. ( = 90 deg)
When you turn off the engine the computer runs a self test that’s makes the leg open and close two times. Then go to zero deg. ( rest position)
if you fix the VDO ( just after the installation ) - then what you should do ?
turn your car 3 times for 1 min each time - on the tired time the malfunction indicator ( yellow engine) should lit off and disappear.
if the prob is still there then the lit will remain and you need to continue finding your prob!!
 
#19 ·
I have recently been through this and found a fix, I made a webpage to outline it. Here ya go

https://sites.google.com/site/p2015fix/home

Hello Lowyo,


i think you solved the mystery !! Your conclusion is close to mine but i didn't success to put it in words like you. i also think that all those motors are just fine - its only so "loss" of the manifold that makes its all wrong. to put that "stopper" sounds like the perfect solutions - still complex to implement...

Maybe someone can think of a simple way to limit the movement of that motor Arm. ...


else we will have to use your idea till someone will come up with simple solution. (Maybe some metal cord??.. or metal chain?? .. not sure...)


But well done for you solving that issue the deepest way !!!

Uri
 
#20 ·
Props to lowvo. I really think he is onto something. I have not heard good long term results from people e-clip/Jesus clipping the linkage. I came up with my own travel limiter with wire and a zip-tie (for adjustability) that loops to the engine hoist hook just forward of the flap motor. It didn't involve taking anything apart and was super cheap. Just did it tonight, and the light is off so far.
With wire, create a secure loop (I used a cable ferrule) to secure the metal part of the flap-motor arm just inboard of the forward spring hook notch. You only need a couple inches of wire lead to another secure loop that the zip-tie can fit through (use a large black zip-tie). Run the zip-tie through the engine hoist loop and tighten it only enough to take up the slack in the wire. After that, it is just erase code as lowvo describes on his site, and click the zip-tie tighter notch by notch until the code stays away (meaning you have applied enough retention force that the motor can't travel rearward out-of-range anymore.
I'll post a pic or two and promise to update when I'm sure it is really fixed.
 
#22 ·
I have recently been through this and found a fix, I made a webpage to outline it. Here ya go

https://sites.google.com/site/p2015fix/home
First time posting. FWIW, this worked for me (brilliant insight by lowvo, BTW). 2009 TDI 86K miles. Intermittent P2015 after a few weeks became solid CEL. Flap motor appeared dead through VCDS but if I held the actuator arm about 30 degrees from resting it would move during VCDS output tests. First loosen flap motor unit for better access to remove arm spring. I used forceps clamped to the spring so I wouldn't lose it. Verified myself.....arm in wrong start position means actuator fails self-test when the car is started hence the instant/persistent CEL. Didn't do any mods relating to e-clip solution.
 
#23 ·
Thanks so much Guys! I have a 2010 Jetta TDI with a 130K miles. I just had the timing belt done at $1300. Then about a month later I get the check engine light. I take it into the dealer, and they said I needed a while new manifold. It's only a mere $900. After reading this thread, I used some safety wire to bring the arm back a little bit. I start the car and watch as it goes forward where I guess it should be at idle. After 3 times of starting it the check engine light goes out and its back to normal. I did notice after I turn off the key the motor cycles a few times. Is that normal, or did I move the arm to far forward? REVOLUTIONary2B I looked in home depot to do the same thing you did. Where did you find the small wire clips at? Thanks Again!
 
#26 ·
Hi folks, new to the forums here...
I just got this code on wife's '09 Jetta (just clicked over 200k miles btw). Anyway, some great info and links here. I pulled off the flap motor and as others here, it will not function on a VCDS test. If I run the test and pry the spring attachment point up, it will cycle on/off, but won't repeat unless slightly pried on again). So, I'm thinking the set-screw mod is in my very near future. The ball/socket part seems fine, it was greased and resisted being pried off.

However, I did want to verify that replacing and motor and/or the "dog bone" (actuator rod) will not fix the issue...the problem is excessive travel of the flaps themselves (i.e. this is why the entire intake manifold gets replaced)? Do I have that right? Thanks much....
 
#27 ·
Correct. The issue IS excessive travel, not dog bone linkage. Creating your own mechanical stop (either bolt or cable-loop method) is the answer. After taking it all apart and seeing how things work, I don't think it is reasonable or realistic to even suggest the linkage could cause this issue. Even if the linkage were broken, I don't think you would get and out-of-range code.